Veiled Realms: Day 1 update
- Author
- Sandra Fikes
- Published
- Read Time
- ~ 4 min
- Categories
- Environmental Design
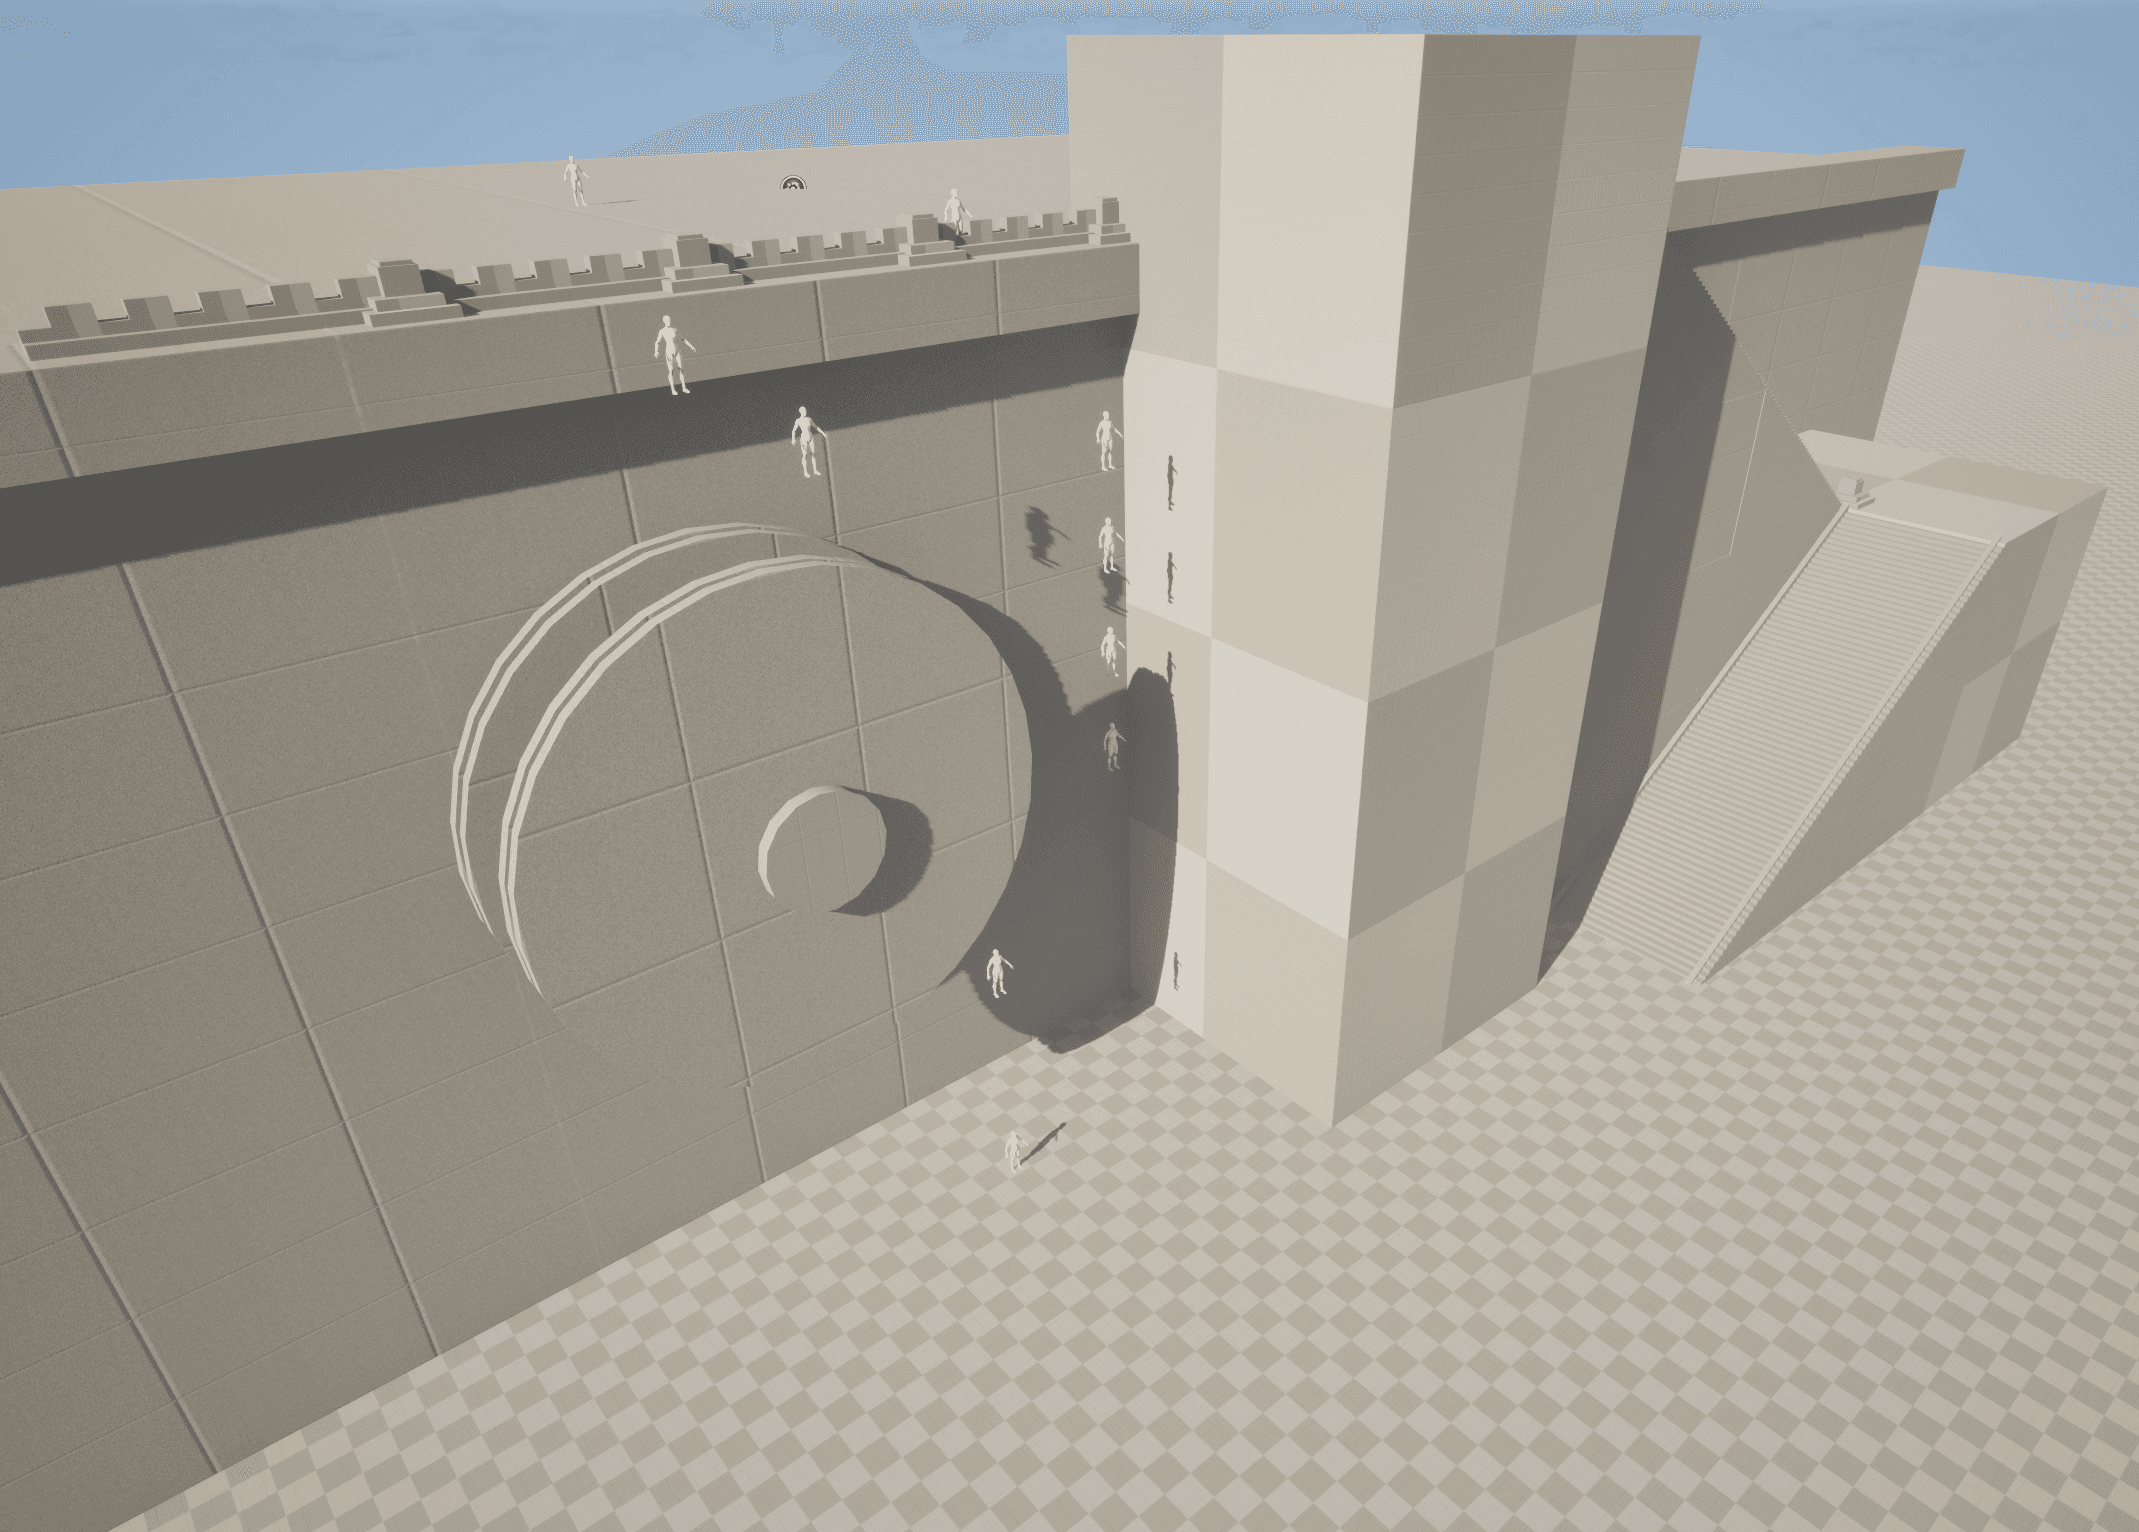
Greyboxing is an easy part of the process of environment design for self-taught solo game devs to overlook when creating an environment for a game. Too many instructional guides dive right into showing people how to grab assets from their source of choice, as though it was easy to just start throwing fully built and textured assets into a scene and coming out an hour later with a fully operational game level.
This might be possible for those with years of experience, but for those still learning how a level should work, how depth of field and point of view and a million and one other things can impact the environment... for us normal struggling game designers, greyboxing is essential. At least in my humble opinion.
I went many years building scenes without first greyboxing them out. In truth had not even known exactly what greyboxing was and why building it was so important until handful of years ago.
For those who are not sure: Greyboxing is the stage in level design where basic untextured shapes are used to build the bones of the environment. This provides a streamlined look at the paths characters can traverse and see, so that long before assets are brought in, the level designer and game dev know that when thee player walks up a staircase they will see the focal point that the developer wants them to see to get the best emotional and visual impact. It is far easier to change the height of stairs to time a climb, or to move a box representing an ancient alter than it is to go in and make those changes to a scene with hundred or thousands of small prop items scattered around it.
Today I have been working on the approach to the top of the dam in my Veiled Realms environment of the large dam from the Baj-Sheerh city from Max Bedulenko's Velvet Road series. Below is today's progress on the greyboxing to get the size of the dam looking right.
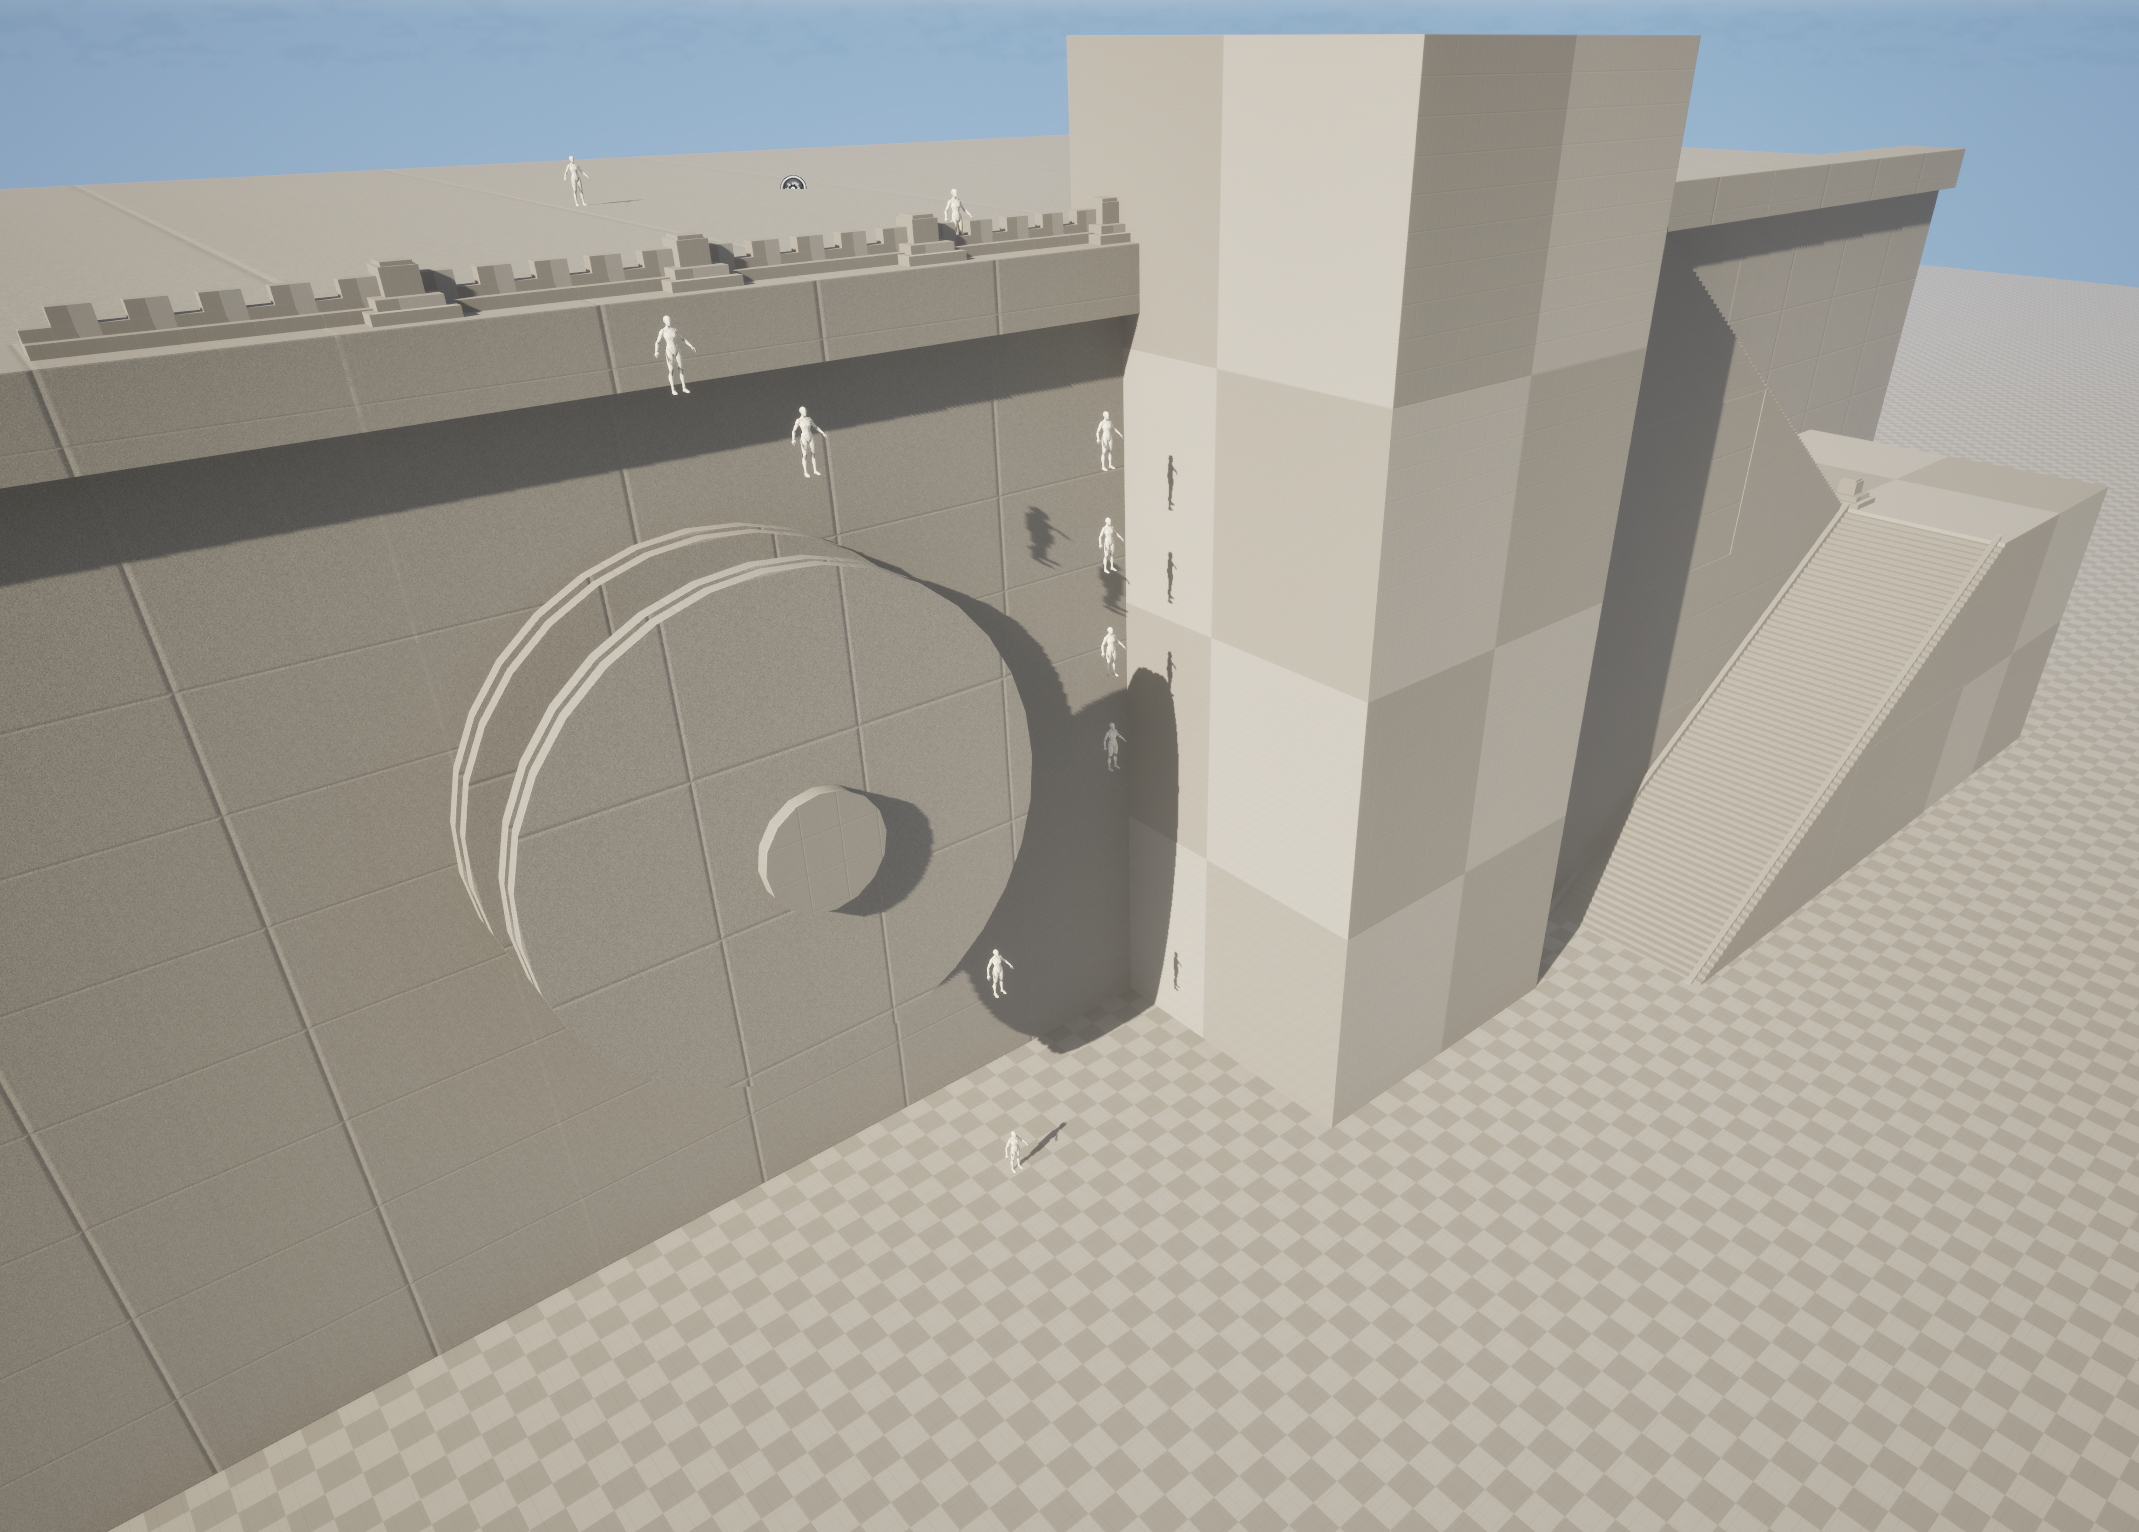
The figures started out lined up standing atop one another's heads too give a rough size for the wheel. Allowing me to guestimate the scale of one of the more visually unique parts of the scene that will be animated in the final setting. Once the wheel was in place I moved the figures around to give me a rough idea on where platforms that men might stand on were in the reference artwork.
I superimposed a translucent image of the reference art over the above greyboxed image, to doublecheck how things look at this point so I can make any major changes before proceeding too the next part of the model: the scaffolding.
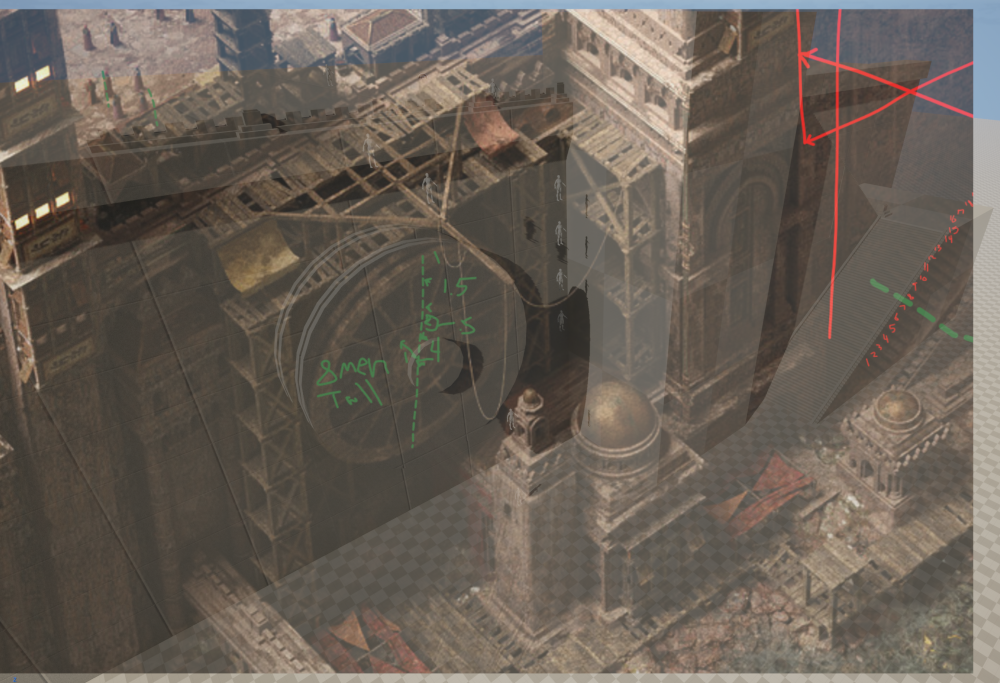
You can see the math I did with grease pencil on the right in red, counting steps and determining angles and repeating geometries for how to build the staircase. Thee green dashed line on the stairs was me estimating width based on the approximate height of the figures on top of the dam near the top of the stairs. The same sort of green dashed lines and basic math was being used on the wheel to compare its scale to nearby figures.
Before I built the wheel, I did end up doubling the size of the stairs because when II did test run of the game the dam looked too small when standing at the base of it. So rather than 38 steps on each flight of stairs, they each have 76 steps. A change that would have been much more difficult if I had built them up with assets before determining how the character viewed the scene.
For now I am going to start work on the scaffolding around the wheel and the small building in front of the wheel, because those will finalize the required height and width of that area, which will define the measurements of the rest of the environment.
This might not be how it is supposed too be done, but I find it works for me.